Simple 2D SDF tutorial
This my tutorial shows how to use 2D SDF shape to create some basic effect.
(Notice links to many useful resources)
Read this first if you do not know what SDF is - link to blog on ronja-tutorials.com
Look there for Simple Combinations such as - merge, intersect, subtract, and others.
Down below I use merge operation, that literally just min(shape1, shape2); so I use directly min.
Useful inks:
- 2D distance functions - this page has list of more basic SDF shapes, I use just Circle.
- hg_sdf - repetition
pModand generalized combinationsfOp- work for 2d and 3d same. - Or/and distance functions - search
opSmoothUnion- there. - 3d sdf shapes 3D distance functions.
And notice - Inigo Quilez smooth minimum Article - extremely useful
Content:
- SDF of Circle and Circle
- Two circles
- Glow edge
- Adding Noise glow
- Animating everything (final effect with shadertoy link)
Copy-paste shader code to Shadertoy.com ___
SDF of Circle and Circle:
Basic SDF
float sdCircle( vec2 p, float r )
{
    return length(p) - r;
}

void mainImage( out vec4 fragColor, in vec2 fragCoord )
{

    vec2 res = iResolution.xy/iResolution.y;
    vec2 uv = fragCoord.xy / iResolution.y-res*0.5;
    uv*=2.;

    vec3 col = vec3(0.);

    float d = 1.;
    d = min(d,sdCircle(uv,0.4));

    // d is sdf, abs(d) because d is negative when it on other side of edge, d==0 is edge
    col = vec3(abs(d));

    fragColor = vec4(col,1.0);
}
Edge of SDF (selecting border)
float sdCircle( vec2 p, float r )
{
    return length(p) - r;
}

void mainImage( out vec4 fragColor, in vec2 fragCoord )
{

    vec2 res = iResolution.xy/iResolution.y;
    vec2 uv = fragCoord.xy / iResolution.y-res*0.5;
    uv*=2.;

    vec3 col = vec3(0.);

    float d = 1.;
    d = min(d,sdCircle(uv,0.4));

    // pixel size for antialiased SDF shape, 2.* because uv*=2.; above so 2 is scale of uv
    float px = 2.*(1.5/iResolution.y);
    col = vec3(smoothstep(0.0,px,abs(d)-0.01)); // edge of sdf 0.01 is thickness of edge

    fragColor = vec4(col,1.0);
}
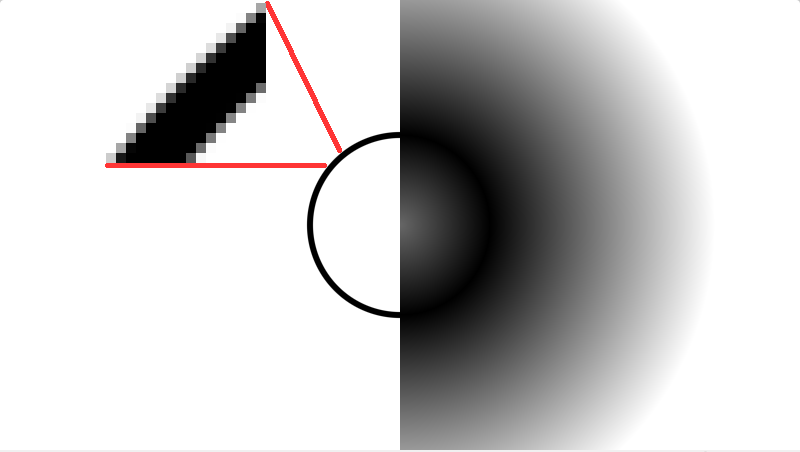
New code is float px... where 1./iResolution.y is pixel size, I add +0.5 for more smooth transition.
And smoothstep to select smooth edge, result on screenshot.
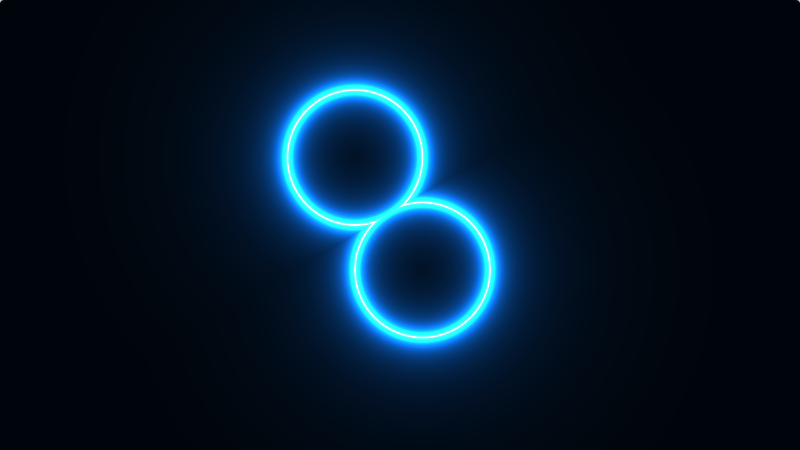
Two circles:
float sdCircle( vec2 p, float r )
{
    return length(p) - r;
}

void mainImage( out vec4 fragColor, in vec2 fragCoord )
{

    vec2 res = iResolution.xy/iResolution.y;
    vec2 uv = fragCoord.xy / iResolution.y-res*0.5;
    uv*=2.;

    vec3 col = vec3(0.);

    vec2 c1 = vec2(-0.1,0.2); //pos of first circle
    vec2 c2 = vec2(0.2,-0.3); //pos of second circle

    float d = 1.;
    d = min(d,sdCircle(uv+c1,0.3));
    d = min(d,sdCircle(uv+c2,0.3));

    // pixel size for antialiased SDF shape, 2.* because uv*=2.; above so 2 is scale of uv
    float px = 2.*(1.5/iResolution.y);
    col = vec3(smoothstep(0.0,px,abs(d)-0.01)); // edge of sdf 0.01 is thickness of edge

    fragColor = vec4(col,1.0);
}
I just add position of circles, everything else is same. (and changed radius of circles to 0.3) ___
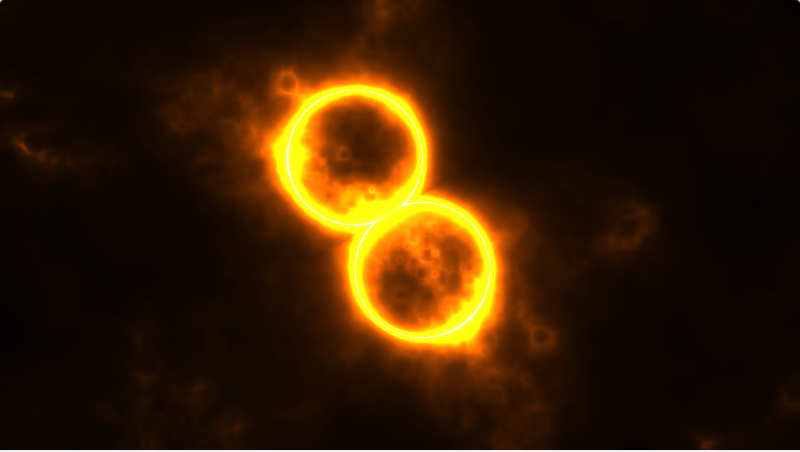
Glow edge:
Basic SDF glow is - 0.01/d
For test use this - col = vec3(0.01/max(abs(d),0.0001));
More correct glow - look this shadertoy shader Smoothed Airy intensity / glow by FabriceNeyret2. (just as reference, not needed in this tutorial)
Code from screenshot:
float sdCircle( vec2 p, float r )
{
    return length(p) - r;
}

void mainImage( out vec4 fragColor, in vec2 fragCoord )
{

    vec2 res = iResolution.xy/iResolution.y;
    vec2 uv = fragCoord.xy / iResolution.y-res*0.5;
    uv*=2.;

    vec3 col = vec3(0.);

    vec2 c1 = vec2(-0.1,0.2); //pos of first circle
    vec2 c2 = vec2(0.2,-0.3); //pos of second circle

    float d = 1.;
    d = min(d,sdCircle(uv+c1,0.3));
    d = min(d,sdCircle(uv+c2,0.3));

    col = (0.5 + 0.5*cos(iTime+vec3(0,1,2))); // basic color that change on time
    //col = max(col,vec3(0.051)); // uncomment if you want static white glow at edge

    col = col*0.051/max(abs(d),0.0001); // edge glow

    fragColor = vec4(col,1.0);
}
Line col = col*0.051/max(abs(d),0.0001); glow for this example.
Adding Noise glow:
Added fbm function and use of fbm noise value d=d*d_fbm;
float hash(vec2 p)
{
    p  = fract( p*0.3183099+.1 );
  p *= 17.0;
    return -1.+2.*fract( p.x*p.y*(p.x+p.y) );
}

// simple (and bad!) value noise
float noise( in vec2 p )
{
    vec2 i = floor( p );
    vec2 f = fract( p );
  vec2 u = f*f*(3.0-2.0*f);
    return mix( mix( hash( i + vec2(0.0,0.0) ),
                     hash( i + vec2(1.0,0.0) ), u.x),
                mix( hash( i + vec2(0.0,1.0) ),
                     hash( i + vec2(1.0,1.0) ), u.x), u.y);
}

// modified fbm func
float fbm(in vec2 p)
{
  float z=2.;
  float rz = 0.;
  vec2 bp = p;
  for (float i= 1.;i < 6.;i++)
  {
    rz+= abs((noise(p)-0.5)*2.)/z;
    z = z*2.;
    p = p*2.;
  }
  return rz;
}

float sdCircle( vec2 p, float r )
{
    return length(p) - r;
}

void mainImage( out vec4 fragColor, in vec2 fragCoord )
{

    vec2 res = iResolution.xy/iResolution.y;
    vec2 uv = fragCoord.xy / iResolution.y-res*0.5;
    uv*=2.;

    vec3 col = vec3(0.);

    vec2 c1 = vec2(-0.1,0.2); //pos of first circle
    vec2 c2 = vec2(0.2,-0.3); //pos of second circle


    float d = 1.;
    d = min(d,sdCircle(uv+c1,0.3));
    d = min(d,sdCircle(uv+c2,0.3));

    float d_fbm = fbm(uv*2.); // d_fbm is 0+
    d=d*d_fbm;

    col = (0.5 + 0.5*cos(iTime+vec3(0,1,2))); // basic color that change on time
    //col = max(col,vec3(0.051)); // uncomment if you want static white glow at edge
    col = col*0.051/max(abs(d),0.0001); // edge glow

    fragColor = vec4(col,1.);
}
Animating everything (final effect):

Shadertoy shader link - https://www.shadertoy.com/view/fsdyRl
Shader code (same as on shadertoy):
// Created by Danil (2022+)
// License - CC0 or use as you wish

// made for https://github.com/danilw/danilw.github.io/blob/master/blog/simple_SDF_tutorial/

// uncomment v1 or v2 or v3 to see different animation (line 77-79)


float hash(vec2 p)
{
    p  = fract( p*0.3183099+.1 );
  p *= 17.0;
    return -1.+2.*fract( p.x*p.y*(p.x+p.y) );
}

// simple (and bad!) value noise
float noise( in vec2 p )
{
    vec2 i = floor( p );
    vec2 f = fract( p );
  vec2 u = f*f*(3.0-2.0*f);
    return mix( mix( hash( i + vec2(0.0,0.0) ),
                     hash( i + vec2(1.0,0.0) ), u.x),
                mix( hash( i + vec2(0.0,1.0) ),
                     hash( i + vec2(1.0,1.0) ), u.x), u.y);
}

// modified fbm func
float fbm(in vec2 p)
{
  float z=2.;
  float rz = 0.;
  vec2 bp = p;
  for (float i= 1.;i < 6.;i++)
  {
    rz+= abs((noise(p)-0.5)*2.)/z;
    z = z*2.;
    p = p*2.;
  }
  return rz;
}

float sdCircle( vec2 p, float r )
{
    return length(p) - r;
}

void mainImage( out vec4 fragColor, in vec2 fragCoord )
{

    vec2 res = iResolution.xy/iResolution.y;
    vec2 uv = fragCoord.xy / iResolution.y-res*0.5;
    uv*=2.;

    vec3 col = vec3(0.);

    vec2 c1 = vec2(-0.1,0.2); //pos of first circle
    vec2 c2 = vec2(0.2,-0.3); //pos of second circle


    float d = 1.;
    d = min(d,sdCircle(uv+c1,0.3));
    d = min(d,sdCircle(uv+c2,0.3));

    // anim loop timer (color use own iTime)
    // 0-0.5 beginning (first half, look smoothstep usage)
    // 0.5-1 ending (second half)
    float anim_timer = fract(iTime*0.15);
    //anim_timer = iMouse.x/iResolution.x; // for testing

    float d_fbm = fbm(uv*2.); // d_fbm is 0.+
    float d_fbm2 = fbm(uv*5.); // additional for coloring
    d_fbm = (d_fbm-smoothstep(0.,0.5,anim_timer)*3.);

    //animations, uncomment one of this
    //d = d*d_fbm+d_fbm2*(0.2*(1.-smoothstep(0.15,1.,anim_timer))); //v1
    //d = abs(d)*d_fbm+d_fbm2*(0.2*(1.-smoothstep(0.15,1.,anim_timer))); //v2
    d = (abs(d)-0.35*(1.-smoothstep(0.15,1.,anim_timer)))*d_fbm+d_fbm2*(0.2*(1.-smoothstep(0.15,1.,anim_timer))); //v3

    vec3 ocol = (0.5 + 0.5*cos(iTime*1.35+vec3(0,1,2))); // basic color that change on time
    col = ocol;
    col*=0.21/max(d_fbm2,0.0001); // addition coloring
    col = max(col,vec3(0.151)); // uncomment if you want static white glow at edge
    col = col*0.151/max(abs(d),0.0001); // edge glow

    col = (col-0.5*col*smoothstep(0.,0.5,length(col)))+col*ocol.bgr; // some extra coloring
    col = clamp(col,0.,1.);
    fragColor = vec4(col,1.);
}
There many ways to do effects like this, my example just showing basic-steps to create this effect.
For example - you can shift UV that used for SDF d = min(d,sdCircle(uv+c1+d_fbm*0.1,0.3)); by adding d_fbm(or any noise) to UV and then use morphed SDF shape in next steps.
And instead of “procedural SDF generation” texture can be used, if you make SDF-like looking texture in GIMP then just do float d = texture(<your texture>, UV).x;